How to Use Ophthalmoscope: A 7-Step Protocol Guide
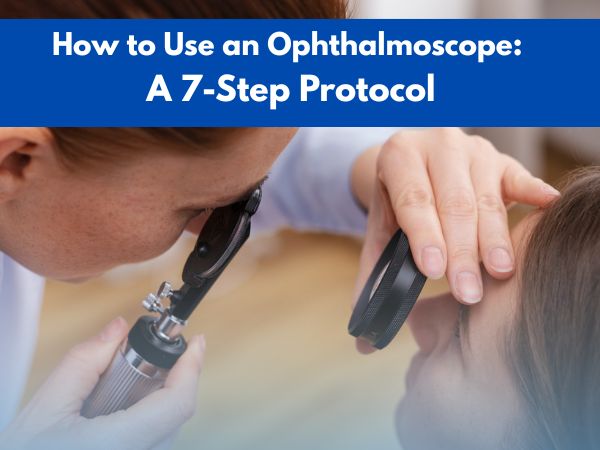
Ophthalmoscopes are the handheld tools especially designed for visualizing the internal structures of the human eye by a process called fundoscopy or ophthalmoscopy. The method is simple and takes only 10 to 15 minutes to conduct, but some confusion exists regarding how to use ophthalmoscopes in the right way to get the best results. In this regard, the following section covers the 7-step protocol that should be followed by ophthalmologists or optometrists to conduct fundoscopy.
Regular fundoscopy is necessary for diabetic patients
In this article, we will address the question of how to use ophthalmoscopes to conduct an eye fundus examination. In addition, some of the well-known ophthalmoscope brands have also been linked for the reader’s convenience.
What is Fundoscopic Examination or Ophthalmoscopy?
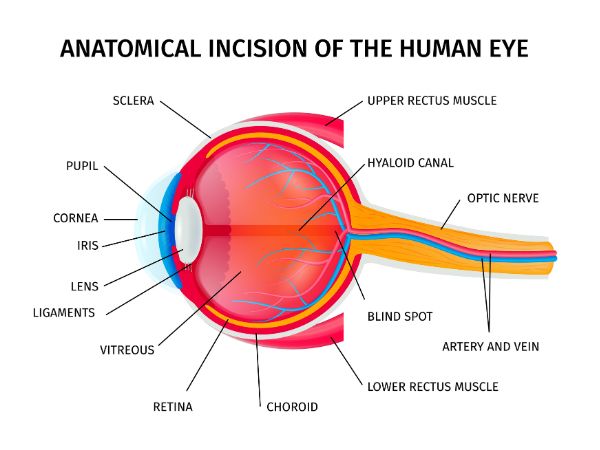
The fundus of the eye refers to the internal parts of the human eye, including the third layer called the retina, macula, fovea, optic disc, as well as the blood vessels surrounding the area. The retina is rich in photoreceptor cells known as rods and cones, which are responsible for vision during the night and daytime, respectively. When this eye fundus is examined using an ophthalmoscope, the process is called ophthalmoscopy.
Purpose of a Fundocsopic Exam
While learning about how to use ophthalmoscope, it is important to note that the fundoscopy of the eye is conducted to diagnose the following medical conditions by visualizing their symptoms:
- Diabetic retinopathy (indicated by the presence of hemorrhages and microaneurysms in the eye)
- Retinal tears or detachments
- Macular degeneration
- Cataracts
- Blood vessel damage due to hypertension
- Swollen optic nerve (due to an increased intracranial pressure or presence of tumors)
- Presence of melanomas in the eyes
How to Use Ophthalmoscope Using the 7-Step Protocol?
While learning about how to use ophthalmoscope, it is important that the physicians follow the correct method to conduct fundoscopy. In this regard, a 7-step approach has been introduced that breaks down the fundoscopic examination process into segments that are easy to follow. The given section covers the complete protocol:
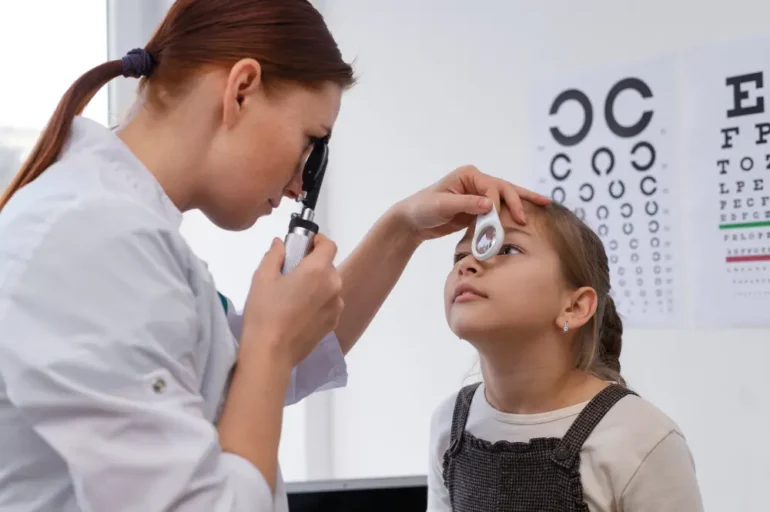
Step 1: Prepare the Patient and the Equipment
The first step of learning how to use ophthalmoscopes is to prepare the patient. At this stage, the patient is asked to give consent for the procedure. It is essential to explain to them the steps that are going to be followed during the process.
Once their consent has been obtained, the next step is to position them in a way that they remain comfortable throughout the fundoscopic examination. To help dilate the pupil, dimming the lights of the room is also recommended. However, pupil-dilating drops (mydriatics) can also be used if there are no contraindications.
Now, when the patient is ready, prepare the ophthalmoscope. To do so, turn the device on and set the diopter wheel to either zero or neutral.
Step 2: Choose a Suitable Position
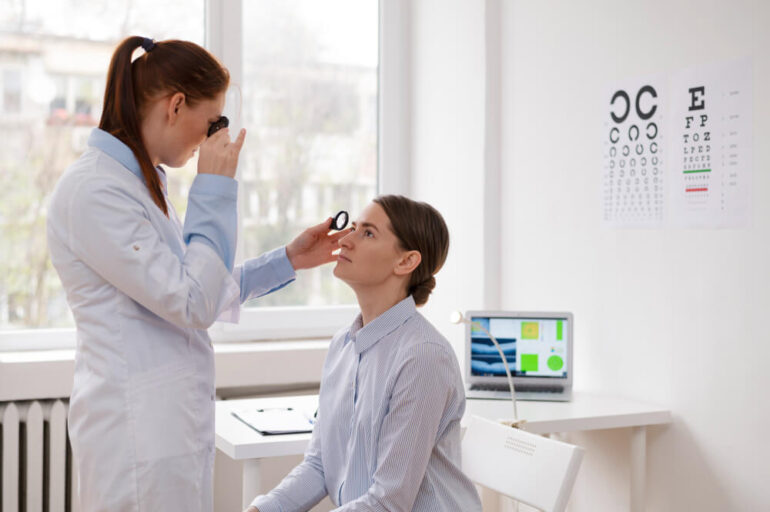
Now, when both the patient and the instrument is ready, the next step of learning how to use ophthalmoscopes is to position yourself in a way that the examination becomes smooth. Here, the right-right-right rule is followed. This means that when the patient’s right eye is being examined, the healthcare provider should hold the ophthalmoscope in her right hand and check the patient using her right eye.
If the patient’s left eye needs examination, the healthcare provider should use their left hand and left eye. This way, the alignment makes the process easy by keeping the ophthalmologist comfortable in their movements.
Step 3: Find the Red Reflex
Now, the ophthalmoscope is held in front of the patient’s eye at a 15-degree angle while maintaining a distance of approximately 15 inches or 30 centimeters (cm). While learning how to use ophthalmoscopes, make sure that the patient keeps the eye open to allow examination. If he or she is not able to do so, the healthcare provider should hold the eyelid with their free hand to ensure stability.
Once the patient is stable, shine the light into their pupil, which will reflect from the retina, causing a bright orange/red glow, called red reflex. This red reflex confirms that the ophthalmoscope is showing a clear view of the fundus.
Step 4: Adjust the Focus
At this stage of learning how to use ophthalmoscopes, the healthcare provider needs to move the device closer to the patient’s eye while maintaining a 15-degree angle, along with keeping the red reflex in sight. Now, move the diopter wheel using your index finger. This will give you a sharp image of the retina, which can then be examined.
Normal appearance of the human eye during fundoscopy indicates the absence of any disease
Step 5: Find the Optic Disc
During a fundoscopic examination, the optic nerve appears as a round, yellowish-orange area. If it is not easily visible, it can be located by following the retinal blood vessels until the point where they converge. Here, the color and shape of the optic disc need to be examined. Additionally, while learning about how to use ophthalmoscopes, the size of the central cup and the margin clarity should also be noticed.
Step 6: Observe the Retina
After examining the optic nerve, the next step while learning how to use ophthalmoscopes is to examine the retina in detail. In this regard, the four quadrants of the retina, i.e., superior temporal, superior nasal, inferior temporal, and inferior nasal, are observed.
The presence of any abnormality or damaged area of the retina as well as the retinal blood vessels, is noted. This often includes narrowing, hemorrhages, or blockages. During this process, the ophthalmoscope can be pivoted as a single unit to get a clear view of each part of the eye fundus.
Step 7: Check Macula and Conclude
As macula is the area of the eye fundus that is most sensitive to light, it can lead to the constriction of pupil when examined using an ophthalmoscope. Therefore, it is observed at the end of the fundoscopy. For its examination, the patient is asked to look directly into the light source.
While learning about how to use ophthalmoscopes, keep in mind that once the fundoscopic examination has been completed, document the findings and prescribe medication or recommend further procedures accordingly.
Eye Fundus Examination: How Do the Abnormalities Look?
When it comes to learning about how to use ophthalmoscopes, it is equally important to know which observations indicate an abnormality in the eye fundus. The following section covers some of the signs observed by using an ophthalmoscope, along with their possible interpretations:
| Fundus Part | Normal Appearance | Abnormalities | Possible Problems |
| Optic Disc | Round disc with well-defined margins, pale and pink in color, central depression called optic cup is present | · Swelling with blurred margins
· Enlarged optic cup with loss of pink neural tissue · Swelling, vision loss with pain |
· Papilledema
· Glaucomatous cupping
· Optic neuritis |
| Retina | Translucent with orange/red background | · Retina is elevated
· Flame-shaped clot or dot · Darker lesions · White or yellow spots with lipid or protein deposits |
· Retinal tear/detachment
· Hemorrhage
· Melanoma · Exudates |
| Retinal blood vessels | Narrower, brighter red arteries branching out from the optic disc | · Hemorrhage, cotton-wool spots, arterial narrowing
· Hemorrhages, microaneurysms, hard exudates, abnormal new vessel growth · Blocked arteries or veins with retinal discharge |
· Hypertensive retinopathy
· Diabetic retinopathy
· Vessel occlusions |
| Macula and Fovea | Darker, avascular region, central bright spot is visible | · Yellow deposits with leaking blood vessels
· Swelling |
· Age-related macular degeneration
· Macular edema |
While learning about how to use ophthalmoscopes, keep in mind that the final assessment of the condition is only to be made by a trained healthcare provider.
Continuously worsening eyesight can indicate the presence of an eye disorder
Ophthalmoscopes and Related Parts at Health Supply 770: Features and Specifications
When it comes to eye examination, using an ophthalmoscope is the best way to visualize the internal structures of the eyes. However, when addressing the question of how to use ophthalmoscopes, it is important to follow the right steps so that the examination can be thorough and result in an accurate result.
However, when it comes to learning about how to use ophthalmoscopes, it is also essential to look into some of the products that many brands manufacture. Some of these well-known ophthalmoscopes and their related parts are also available at Health Supply 770 and have been detailed below, along with their features and purchase links:
Welch Allyn Coaxial Ophthalmoscope for Eye Examination– 3.5V LED 11720-L
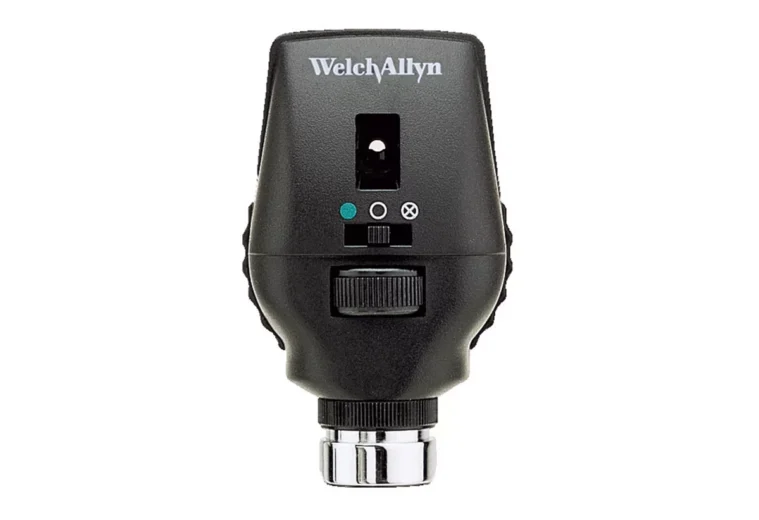
Welch Allyn Coaxial Ophthalmoscope for Eye Examination– 3.5V LED 11720-L
US$264.88
Product Details
Welch Allyn coaxial ophthalmoscope is a handheld tool employed for visualizing the fundus of the eye. These otoscope heads are attached to multiple suitable Welch Allyn equipment before examination. Owing to their accuracy, the product is widely used in healthcare facilities, including hospitals, clinics, etc.
Moreover, while learning about how to use ophthalmoscopes, keep in mind that the product allows a clear image of the eye fundus, particularly due to its shadow-free viewing. This also reduces the likelihood of glaring during fundoscopy which further increases the accuracy of the procedure.
In addition, these Welch Allyn coaxial ophthalmoscopes also have a 3.5V LED illumination that is long-lasting and, therefore, does not require frequent battery changes. Furthermore, varying diagnostic needs are met due to the 18 unique aperture or filter combinations.
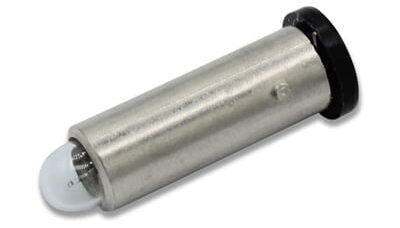
Welch Allyn 03000U6 3.5V Halogen Lamps, Ophthalmoscope for 11710/8000, BX6
https://hs770.com/product/welch-allyn-03000u63-5v-halogen-lamp-ophthalmoscope-for-11710-8000-bx6/
https://hs770.com/product/welch-allyn-halogen-bulb-for-ophthalmoscope/
Product Details
Welch Allyn 03000U6 3.5V halogen lamp for ophthalmoscopes is a product that is manufactured with a bi-pin base and two small pins. The purpose of these pins is to allow the attachment of the product to other ophthalmoscopic devices. In addition, the product is essential during fundoscopic examination as it acts as a source of light and, therefore, illuminates the internal structures of the eye for a quick and easy identification.
Moreover, while learning about how to use ophthalmoscopes, their durability is also a concern. In this regard, these Welch Allyn 03000U6 3.5V halogen lamp for ophthalmoscopes are constructed using sturdy material that renders them long-lasting. Furthermore, as the product is superior to the incandescent bulbs in terms of its performance, it can be used for nearly 2000 hours. Keep in mind that the halogen bulbs used to conduct eye fundoscopy are usually single or double-coiled.
*Note: The prices mentioned in the article are taken from the Health Supply 770 website. These may vary over time.

Regular eye examination allows the detection of eye diseases at an earlier stage
The products linked in the article, while learning about how to use ophthalmoscopes, along with many other medical supplies, can be purchased from Health Supply 770, a reliable name when it comes to medical products. They have a 30-day money-back guarantee and provide your products to you in the shortest possible time. Click the link at the end of the article to check the wide range of eye examination products.
Conclusion
Ophthalmoscopes are the handheld tools that are used for examining the eye fundus. These are easy to use instruments that allow healthcare providers to visualize the internal structures of the eye, including retina, optic disc, macula, fovea, and the retinal blood vessels with great clarity. As the procedure only takes 10 to 15 minutes, it is preferred by both the patients and the healthcare staff.
While learning how to use ophthalmoscopes, a 7-step protocol has been established that highlights the correct procedure of using the device and getting accurate results from it. These include setting the instrument, positioning the patient and the healthcare provider, visualizing the eye fundus using the right-right-right rule, and observing the presence of any abnormalities. Overall, the instrument is useful due to its smaller size, ease of usage, and accuracy in terms of results.
Considering their importance, ophthalmoscopes are an integral part of eye examination and are, therefore, needed within all the relevant healthcare facilities. For purchasing different kinds of medical devices, including ophthalmoscopes, reliable vendors like Health Supply 770 should be approached. They ensure the provision of quality products along with satisfactory services.